Table of contents
Microsoft Defender for Endpoint (MDE) retains endpoint telemetry for up to 180 days. This six-month retention period is critical for Incident Response, particularly when investigating long-dwelling threats or historical phishing vectors. However, organizations attempting to access this data programmatically often hit a hard limit: the official Advanced Hunting API only provides access to the last 30 days of data.
While data older than 30 days remains accessible, it is restricted to the “Timeline” view within the Microsoft Defender portal UI. It is important to note that the Timeline utilizes a different schema than the Advanced Hunting tables. However, it covers similar data to the Device* tables that is just as critical for investigations (e.g., process executions, network connections, file events).
Unfortunately, there is no documented public API to query the Device Timeline dataset. Consequently, analysts are forced to rely on the browser interface to retrieve evidence.
This manual approach presents significant friction for forensic investigations:
- Export Restrictions: The UI restricts exports to the last 30 days or, for older data, specific 7-day intervals. This makes retrieving a full six-month history tedious.
- Data Fidelity: The UI exports data in a custom CSV format. This format is a flattened, simplified version of the underlying event data. It strips out critical nested structures—such as
Evidence,InitiatingProcess, or specificNetworkdetails—that are standard in the JSON response. - Scalability: Manually clicking through time ranges for multiple compromised endpoints is inefficient during active incidents.
To address these limitations, I developed a tool to automate the extraction of the full timeline. By interacting with the backend services used by the Defender portal, it is possible to bypass the 30-day API restriction and retrieve the complete, structured JSON logs for the full retention period.
Prior Work & Limitations
The gap between the 30-day API limit and the 180-day UI retention is a known pain point in the community. Several tools have attempted to bridge this gap by leveraging internal APIs, though they often face stability challenges as Microsoft updates the authentication and routing infrastructure.
DefenderHarvester
One of the most notable early efforts in this space was DefenderHarvester, developed by Olaf Hartong. This Go-based utility was designed to extract telemetry by interacting directly with the backend API (https://*.securitycenter.windows.com/api/*).
However, the architecture for accessing these backend services has changed. Direct access to the backend API is no longer permitted; requests must now route through the apiproxy endpoint exposed by the Defender portal. Because DefenderHarvester was built to query the backend directly, these changes prevent the tool from successfully retrieving data in its current form.
XDRInternals
A currently active project is the XDRInternals PowerShell module. This tool demonstrates the correct modern approach: it takes ESTSAUTH cookies and exchanges them for the specific session cookies required to authenticate against the apiproxy endpoints.
While XDRInternals is an excellent general-purpose framework for interacting with various undocumented Defender APIs, its timeline download capabilities are limited for large-scale incident response:
- Retention Limits: The implementation primarily focuses on the standard 30-day window and does not natively implement the specific pagination logic required to automate the fetching of the full 6-month history.
- Concurrency & Granularity: As a PowerShell module, it processes requests sequentially. It lacks the ability to parallelize a single device’s timeline download. If you need 180 days of data for one critical asset, XDRInternals must fetch it linearly. It cannot split that date range into parallel chunks to saturate available bandwidth.
These limitations necessitate a dedicated, high-concurrency tool capable of handling the specific pagination and session management quirks of the full timeline history.
Reverse Engineering the Solution
To build a tool that can download the full timeline, we first need to identify where the data comes from and how to access it legitimately.
The Target
Inspecting the network traffic in the Microsoft Defender portal reveals that timeline data is not fetched via the public Advanced Hunting API. Instead, the frontend makes requests to a hidden proxy endpoint:
/apiproxy/mtp/mdeTimelineExperience/machines/{machineId}/events/
This endpoint serves the rich JSON data we need. The endpoint requires a privileged context: it accepts either a Bearer token for the “Microsoft 365 Security and Compliance Center” resource or a valid, interactive browser session managed through cookies.
Authentication to the Defender Portal
Authentication in Microsoft Entra ID is complex, involving multiple protocols (OAuth2, OpenID Connect) and distinct token types. Figure 1 visualizes the sequence a client navigates to establish a valid session, highlighting two primary mechanisms that can be used to access the apiproxy endpoint:
- Path A: OAuth Authorization Code Flow (Native App/API): This is the standard flow used to obtain Refresh and Access tokens. While typically used for public APIs, this flow can also grant access to the hidden
apiproxyif the client authenticates using a specific first-party Client ID that has pre-authorized scopes for the “Microsoft 365 Security and Compliance Center” resource. - Path B: The Hybrid Flow (Web App): This mirrors the interactive browser experience used by human analysts. In this flow, the client obtains an ID token and authorization code, which are exchanged for ESTSAUTH (Evolved Secure Token Service) cookies. These cookies are the critical precursors that are ultimately swapped for the application-specific session cookies (
sccauth).
The diagram also captures common intermediate states, such as the “Keep Me Signed In” (KMSI) interrupt or the “Proof Up” redirection triggered when MFA is required.
Note: The Microsoft Identity Platform is vast. Figure 1 is a simplified abstraction designed to show how credentials are negotiated for the Defender portal; it omits complex variations like FIDO keys, federated identity providers, or specific conditional access failures.
sequenceDiagram
    autonumber
    participant User
    participant Client
    participant Login as login.microsoftonline.com
    participant SAS as login.../common/SAS
    participant TokenEP as login.../oauth2/token
    participant WebApp as security.microsoft.com

    Note over Client, Login: PHASE 1: INITIALIZATION & DISCOVERY

    %% 1. INITIALIZE
    Note right of Client: Client initiates flow (Query or FormPost)
    Client->>Login: GET /common/oauth2/authorize?client_id=...<br/>&response_mode=form_post<br/>&scope=openid profile
    Login-->>Client: 200 OK (HTML)<br/>Body: $Config { sCtx, sFT, canary, pgid="ConvergedSignIn" }

    %% 2. DISCOVERY
    Note right of Client: Client checks what credential the server expects
    Client->>Login: POST /common/GetCredentialType (JSON)<br/>{username: "user@test.com", flowToken: sFT, ...}
    Login-->>Client: 200 OK (JSON)<br/>{IfExistsResult: 0, Credentials: {PrefCredential: 1, HasPassword: true}}
    Note right of Client: PrefCredential 1 = Password<br/>(2=RemoteNGC, 3=OneTimeCode)

    Note over Client, Login: PHASE 2: AUTHENTICATION STATE MACHINE

    loop Until 302 Redirect
        Note right of Client: Client parses $Config.pgid to determine State

        alt pgid: "ConvergedSignIn" (Password Example)
            Note right of Client: Server requests Password (based on PrefCredential)
            User->>Client: Enters Password
            Client->>Login: POST /common/login (Form-UrlEncoded)<br/>login=UPN, passwd=***, ctx=sCtx, flowToken=sFT, canary
            Login-->>Client: 200 OK (HTML)<br/>Body: $Config { pgid="ConvergedProofUpRedirect", ... }

        else pgid: "ConvergedProofUpRedirect" (MFA)
            Note right of Client: Server enforces MFA. Client starts SAS flow.
            Client->>SAS: POST /BeginAuth (JSON)<br/>{AuthMethodId: "PhoneAppNotification", Method: "BeginAuth", ...}
            SAS-->>Client: 200 OK (JSON) {Success: true, SessionId: "...", Entropy: "..."}

            Note right of User: User approves Notification on Phone

            loop Polling for Approval
                Client->>SAS: GET /EndAuth?sessionId=...&flowToken=...
                SAS-->>Client: 200 OK (JSON) {Success: true, State: "ProcessAuth"}
            end

            Client->>Login: POST /ProcessAuth (Form-UrlEncoded)<br/>type=Main, request=sCtx, flowToken=sFT
            Login-->>Client: 200 OK (HTML)<br/>Set-Cookie: CASAUTH=... (MFA Proof)<br/>Body: $Config { pgid="KmsiInterrupt", ... }

        else pgid: "KmsiInterrupt" (Keep Me Signed In)
            Note right of Client: Server offers to persist session
            Client->>Login: POST /common/login (Form-UrlEncoded)<br/>LoginOptions=1, flowToken=sFT, ctx=sCtx
            Login-->>Client: 200 OK or 302 Found<br/>Set-Cookie: ESTSAUTH=... (Session)<br/>Set-Cookie: ESTSAUTHPERSISTENT=... (Persistent)
            Note right of Client: Primary Authentication Complete
        end
    end

    Note over Client, WebApp: PHASE 3: FINALIZATION

    alt Path A: Standard OAuth (Native App / API)
        Note right of Login: Client requested response_mode=query
        Login-->>Client: 302 Found (Redirect)<br/>Location: https://nativeclient?code=AwAB...

        Note right of Client: Client extracts code
        Client->>TokenEP: POST /oauth2/token (Form-UrlEncoded)<br/>grant_type="authorization_code", code="AwAB..."
        TokenEP-->>Client: 200 OK (JSON)<br/>{ access_token, refresh_token, id_token }

    else Path B: OIDC Form Post (Web App)
        Note right of Login: Client requested response_mode=form_post
        Login-->>Client: 200 OK (HTML)<br/>Body: <form action="https://security.microsoft.com...">
        Note right of Client: Form contains: code, id_token, session_state

        Note right of Client: Client simulates browser form submission
        Client->>WebApp: POST https://security.microsoft.com<br/>Content-Type: application/x-www-form-urlencoded<br/>Payload: code=...&id_token=...

        Note right of WebApp: App validates ID Token & Code
        WebApp-->>Client: 302 Found<br/>Location: /<br/>Set-Cookie: sccauth=... (App Session)

        Note right of Client: Client accesses Protected Resource
        Client->>WebApp: GET https://security.microsoft.com/<br/>Cookie: sccauth=...
        WebApp-->>Client: 200 OK (Dashboard HTML)
    end
Navigating the Cookie Landscape
A critical aspect of this flow is understanding the ESTSAUTH cookies.
- ESTSAUTH: This is the standard session cookie.
- ESTSAUTHPERSISTENT: This cookie is issued when the user selects “Keep me signed in” (KMSI) and has a longer validity period.
Depending on the authentication flow (e.g., when MFA is involved), the /common/login endpoint might return an ESTSAUTH cookie early in the process. However, these intermediate cookies are often not fully established. Attempting to use them to access protected resources can result in error 50058 (“The application tried to perform a silent sign in and the user could not be silently signed in”). This indicates the session is not yet fully interactive-ready.
Obtaining Usable Credentials
To automate access to the apiproxy endpoint, we have a few options for obtaining the necessary credentials:
-
Refresh Tokens (Programmatic): We can generate a refresh token for the “Microsoft 365 Security and Compliance Center” application (Resource ID
80ccca67-54bd-44ab-8625-4b79c4dc7775) using a pre-authorized Client ID (e.g.,1fec8e78-bce4-4aaf-ab1b-5451cc387264). This can be done via AADInternals:Get-AADIntAccessToken -Resource "80ccca67-54bd-44ab-8625-4b79c4dc7775" -ClientId "1fec8e78-bce4-4aaf-ab1b-5451cc387264" -IncludeRefreshToken $trueUseful resources like EntraScopes can be consulted to find other valid first-party applications and their preauthorized scopes.
-
Browser Cookies (Manual): For ad-hoc usage, one can simply log in interactively and extract the cookies from the Developer Tools.
-
Token Exchange (Hybrid): An
ESTSAUTHcookie obtained from an interactive browser session can be exchanged for refresh and access tokens using TokenTacticsV2:Get-EntraIDTokenFromESTSCookie -ESTSCookieType ESTSAUTH -ESTSAuthCookie (Get-Clipboard) -Resource "80ccca67-54bd-44ab-8625-4b79c4dc7775" -Scope "80ccca67-54bd-44ab-8625-4b79c4dc7775/.default offline_access"
While refresh tokens are convenient for automation, exchanging ESTSAUTH cookies for session cookies is often more practical in restrictive environments. This approach allows the tool to bypass conditional access policies that might block native application token acquisition while still permitting browser-based access.
Session Management and Expiration
The ultimate goal of this authentication flow is to obtain the sccauth cookie for security.microsoft.com. This is the application-specific session cookie.
The sccauth cookie has a finite lifespan. When it expires, the frontend (or our tool) cannot simply continue making requests. In the browser, the user sees a specific “Session Expired” overlay:
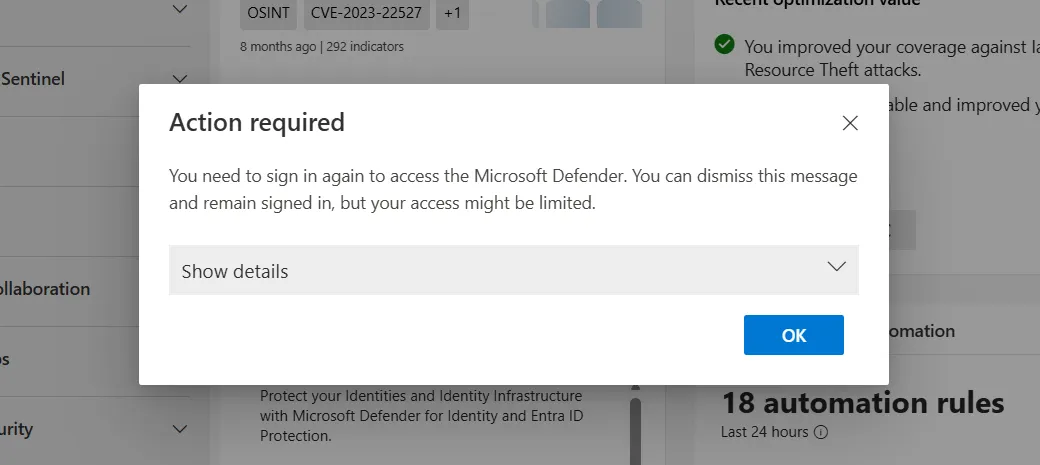
When this occurs, the frontend must trigger the /authorize endpoint again to obtain a new code and ID token, which are then exchanged for a fresh sccauth cookie. The tool handles this re-authentication automatically to ensure long-running downloads (which can take hours for thousands of endpoints) are not interrupted.
Deep Dive: The “Infinite Scroll” Protocol
Unlike standard REST APIs that typically use cursor-based or offset-based pagination, the timeline API implements a time-based “sliding window” mechanism designed to support the UI’s infinite scroll feature. Understanding this protocol is key to automating the download process without gaps or errors.
The Sliding Window Mechanism
While an analyst might need to download 6 months of data, we cannot simply request fromDate=Now-6months and toDate=Now in a single call. The API generally limits the requested time range to a maximum of 7 days per request. To retrieve the full history, we utilize the IsScrollingForward=true parameter in a recursive loop.
The process functions as follows:
- Initial Request: We verify our global start date. The initial API call requests a window starting at this date, with a
toDateof no more than 7 days later (e.g.,fromDate=Jan 1,toDate=Jan 8). - Server Response: The server returns a batch of events (up to
pageSize) and, crucially, anextlink. - The Shift: This
nextlink is not just a pointer to the next page of the current 7-day window. Instead, the server dynamically calculates a newfromDateandtoDatefor this link, effectively shifting the entire time window forward to capture the next batch of events so that the new interval contains exactlypageSizenew items.
Termination Condition
This behavior simplifies the client logic significantly. We do not need to manually calculate subsequent 7-day chunks or manage overlaps. We simply trust and follow the next link provided by the server.
The termination logic relies on the specific targetEndDate of the assigned job. This is the end of the specific 7-day segment. In every iteration, we extract the fromDate parameter from the next link. If this new start date exceeds the chunk’s targetEndDate, the worker marks the chunk as complete and releases the job.
Protocol Flow
Figure 3 illustrates this “fetch-write-advance” loop:
flowchart TD
    Start([Start Download]) --> Init["Construct Initial URL<br/>fromDate = Start<br/>toDate = Start + 7 days"]
    Init --> Request[GET /apiproxy/.../events]

    Request --> Check{Response OK?}
    Check -- No --> Error[Handle Error / Retry]
    Error --> Request

    Check -- Yes --> Parse[Parse JSON Response]
    Parse --> Write[Write Items to JSONL]

    Write --> HasNext{Has 'next' link?}
    HasNext -- No --> Done([Download Complete])

    HasNext -- Yes --> Extract["Extract 'fromDate' from next link"]
    Extract --> Compare{New fromDate > Global Target End?}

    Compare -- Yes --> Done
    Compare -- No --> NextURL[Update URL to next link]
    NextURL --> Request
This approach ensures we retrieve every event without gaps, efficiently traversing months of data by letting the server handle the time-slicing logic.
Tool Architecture
To handle the scale of data involved—millions of events across hundreds of endpoints—a simple loop is insufficient. timeline-dl employs a high-concurrency Worker Pool architecture (built on the pond library) combined with smart state tracking to maximize throughput without complex scheduling overhead.
Parallelizing Time, Not Just Devices
A key innovation in this tool is how it handles time. Downloading 180 days of data linearly for a single device is slow. To speed this up, the tool implements a Time Chunker.
When a user requests 6 months of data for a device, the tool doesn’t create just one job. It calculates the requested range and splits it into logical segments (e.g., 30 days split into four 7-day chunks). This allows multiple workers to download different time periods for the same device simultaneously.
Distributed Completion Tracking
To manage these chunks efficiently, the tool eliminates the need for a central orchestration queue by implementing a “Last-Worker-Merges” pattern. This approach decentralizes the logic, reducing contention and complexity.
- Atomic Tracking: As workers process time chunks (e.g.,
Device A, Jan 1 - Jan 7) in parallel, they report their status to a thread-safe chunk tracker. - The “Closer” Logic: When a worker finishes a download, it checks the tracker to see if it processed the final remaining chunk for that specific device.
- Immediate Merge: If a worker identifies itself as the “closer,” it immediately switches context to perform the merge operation. It streams all temporary chunk files into the final JSONL output and cleans up the disk.
This design ensures that merge operations happen the instant data is ready, keeping the disk footprint low without requiring a separate high-priority queue.
graph TD
    Input[CLI / Device List] --> Chunker[Time Chunker]
    Chunker -->|Submit Jobs| Pool

    subgraph "Worker Pool (pond)"
        Worker[Worker Routine]
    end

    Pool -->|Dispatch| Worker

    Worker -->|Fetch Events| API[Microsoft Defender API]
    API -->|Write Temp| TempFiles[Temporary Chunk Files]

    Worker -->|Update Status| Tracker{Chunk Tracker}

    Tracker -- More Chunks Pending --> Done([Worker Release])
    Tracker -- Last Chunk Completed --> Merge[Merge Operation]

    Merge -->|Stream Copy| Final[Final JSONL Output]
    Merge -->|Cleanup| TempFiles
Stability Patterns
To ensure reliability during these aggressive parallel downloads, the tool implements several stability patterns:
- Global Backoff Coordinator: Rate limits are rarely standard HTTP 429s. The API often returns disguised 403 errors when quotas are hit. The coordinator detects these and forces a synchronized pause across all workers to allow the token bucket to refill.
- Broad Singleflight Implementation: The tool utilizes
singleflight(request deduplication) not just for authentication, but also for device resolution. If 10 workers try to resolveworkstation-01to its MachineID simultaneously, only one API call is made, preventing redundant load on the backend. - Device-Scoped Isolation: Context cancellation is scoped per device. If a critical error occurs for one machine (e.g., it was deleted from the tenant), the tool cancels all pending chunks for that specific device without interrupting the downloads for the rest of the fleet.
- Streaming Merge: The merge process uses
io.Copyto stream data from chunk files to the final output. This ensures that memory usage remains constant, even when merging gigabytes of log data.
The User Interface
Given that downloading timeline data for hundreds of machines can take hours, a static progress bar is insufficient. I chose to build a rich TUI using Bubble Tea, which implements The Elm Architecture for Go applications.
The default “Fancy” mode provides real-time visibility into the worker pool. As shown in Figure 5, it displays the current status of every worker (e.g., “Downloading,” “Resolving,” “Backing Off”), the specific date range being fetched, and the total event count.
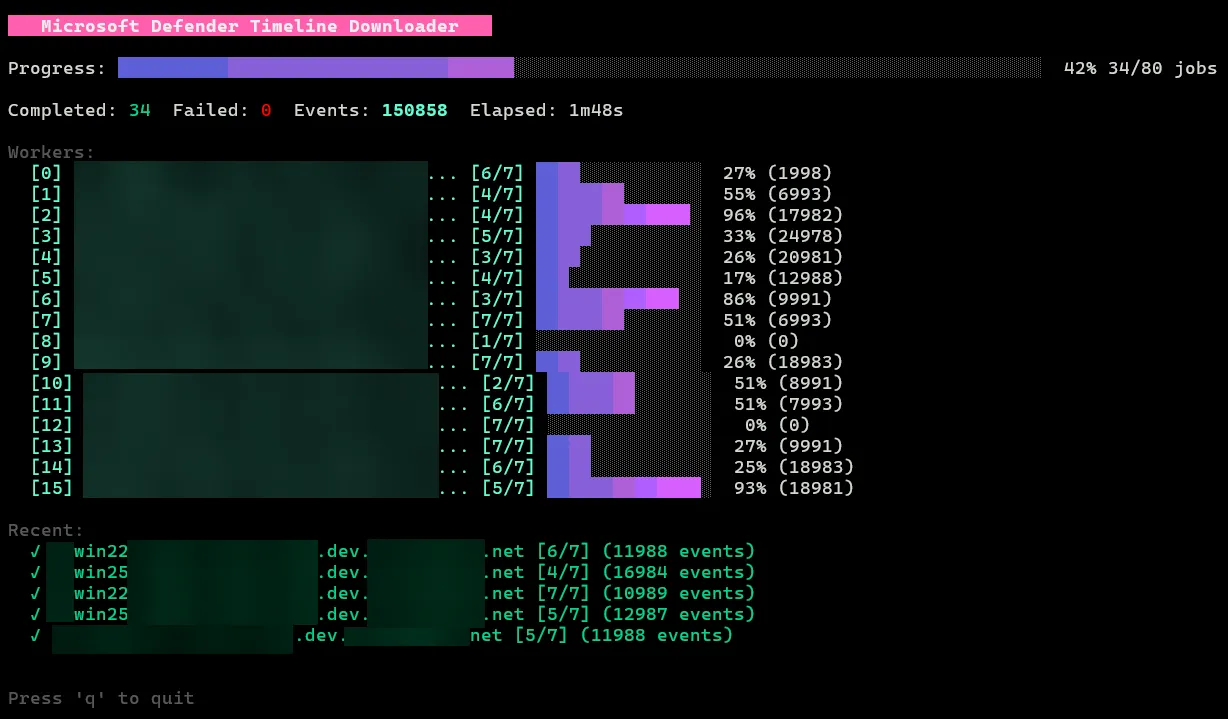
The tool also includes a “Simple” mode (--simple). This mode disables the interactive TUI and emits plain text logs, making it suitable for non-interactive environments like CI/CD pipelines or when piping output to other tools.
Data Output & Structure
Despite the internal chunking, the tool guarantees a clean output: one JSONL file per device. The internal merge jobs transparently combine the temporary chunks into a definitive {hostname}_{machineId}_timeline.jsonl file. We chose JSONL because it naturally supports streaming processing and is immediately ready for ingestion into SIEMs (Splunk, Elastic) or analysis with CLI tools like jq.
Richness vs. Flattened CSV
The most significant advantage of this tool over the manual UI export is data fidelity. The CSV export provided by the Defender portal flattens the data, often discarding the nested relationships vital for understanding context.
For example, a FileCreated event in the JSON output preserves the full InitiatingProcess structure—including parent process hashes, command lines, and user context. Listing 1 below illustrates this depth; these nested objects are exactly the data points that get flattened or discarded in the portal’s standard CSV export.
{
    "IsCyberData": false,
    "ActionTime": "2026-01-18T22:57:16.2718193Z",
    "ActionTimeIsoString": "2026-01-18T22:57:16.2718193Z",
    "ActionType": "FileCreated",
    "Machine": {
        "MachineId": "c3a9c3...e6c980211",
        "SenseMachineId": "c3a9c3...e6c980211",
        "Name": "xxxxxxxxx.net",
        "Domain": "xxxxxxxxx.net"
    },
    "File": {
        "Sha1": "",
        "Sha256": "",
        "FileName": "xxxxxxxx.xml",
        "FolderPath": "C:\\Program Files (x86)\\xxxxxxx",
        "FullPath": "C:\\Program Files (x86)\\xxxxxxx\\xxxxxxxx.xml",
        "FileStateMask": 2065
    },
    "InitiatingProcess": {
        "Id": 4412,
        "CreationTime": "2026-01-18T22:57:14.0530385Z",
        "ImageFile": {
            "Sha1": "d633caf94...5d79b51203118f8",
            "Sha256": "7fc776ed33...ea4258c6",
            "FileName": "xxxxxxx.exe",
            "FolderPath": "c:\\program files (x86)\\xxxxxxx",
            "FullPath": "c:\\program files (x86)\\xxxxxxx\\xxxxxxx.exe"
        },
    ...
}Performance Benchmarks
To validate the architecture, I conducted a series of benchmarks downloading a 7-day timeline for 10 devices. The results highlight the dramatic efficiency gains provided by the Time Chunker and the concurrent worker pool.
The Baseline vs. Parallelism
The test compared a sequential download (simulating a standard single-threaded script) against the tool’s chunked parallel mode with increasing worker counts.
| Configuration | Duration | Speedup |
|---|---|---|
| No Chunking (1 Worker) | 19m 21s | 1x (Baseline) |
| 1-Day Chunks (2 Workers) | 08m 31s | 2.27x |
| 1-Day Chunks (4 Workers) | 06m 21s | 3.04x |
| 1-Day Chunks (8 Workers) | 03m 35s | 5.40x |
| 1-Day Chunks (16 Workers) | 01m 52s | 10.37x |
As shown above, increasing the worker count yields near-linear performance improvements up to a point. By splitting the 7-day window into smaller 1-day chunks, timeline-dl saturates the available network bandwidth and API quota, reducing a ~20-minute task to under 2 minutes.
Comparison with XDRInternals
I originally intended to benchmark timeline-dl against the Get-XdrEndpointDeviceTimeline cmdlet from the XDRInternals module.
However, this comparison proved impractical. In my testing, retrieving a single 7-day window for just one device via the PowerShell module took over 30 minutes. Extrapolating this to 10 devices would suggest a runtime of several hours, making it fundamentally unsuitable for the high-volume data retrieval required during incident response.
This stark difference confirms that while PowerShell modules are excellent for ad-hoc queries, a dedicated Go-based tool with aggressive concurrency is essential for timeline reconstruction at scale.
Conclusion
The 30-day API limit in Microsoft Defender for Endpoint has long been a hurdle for incident responders, often forcing a trade-off between speed and data completeness. By reverse-engineering the timeline protocol and leveraging the apiproxy endpoint, timeline-dl effectively bridges this gap, unlocking the full six-month retention period for programmatic access.
This tool transforms what was previously a manual, click-heavy process into a scalable, automated workflow. It allows forensic teams to quickly secure historical evidence across hundreds of endpoints, ensuring that no critical event data is left behind during an investigation.
The tool is open source and available on GitHub.